
Currently the HDHomerun live viewing app opens with the last channel opened. In general to open Slices [the live viewing guide system] you can enter a number or use the up or down arrows on a keyboard or remote to reveal these tools.
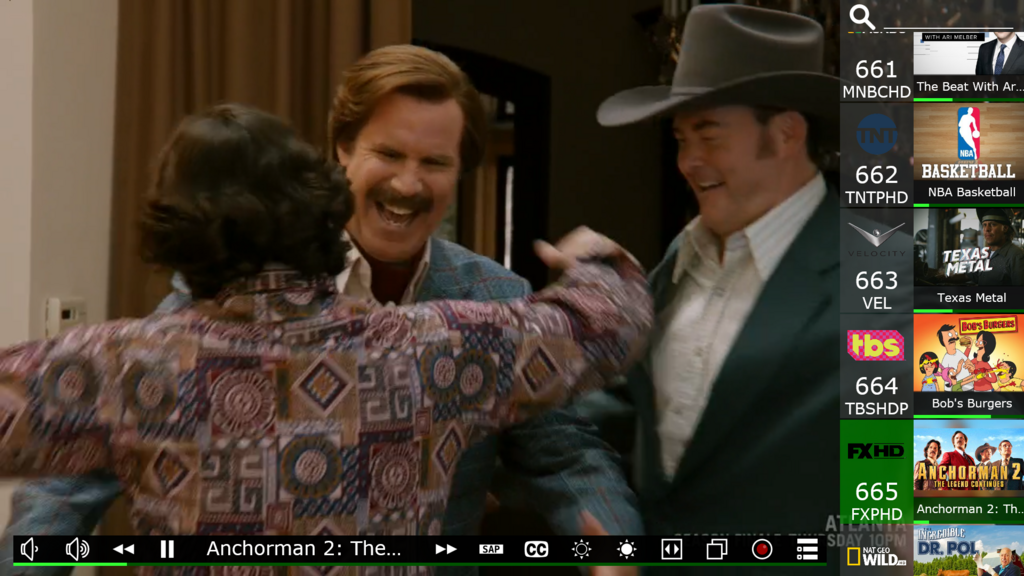
Here you will see the slices channel guide on the right and the action bar on the bottom. The action bar has, starting from the left: up and down audio buttons, << [back 10 seconds], pause[/play], description [expanded description option] , >> [forward 30 seconds], SAP [stereo/5.1], CC [closed caption – which is automatic on mute], screen back light up and down, <> [zoom], [one box overlaps another] Full screen/window, record [currently opens to a task setting page] and Record Engine [opens on the Recordings files page]. Four methods of using slices in W10 via pc or phone are by keyboard, remote control, mouse and touch screen.
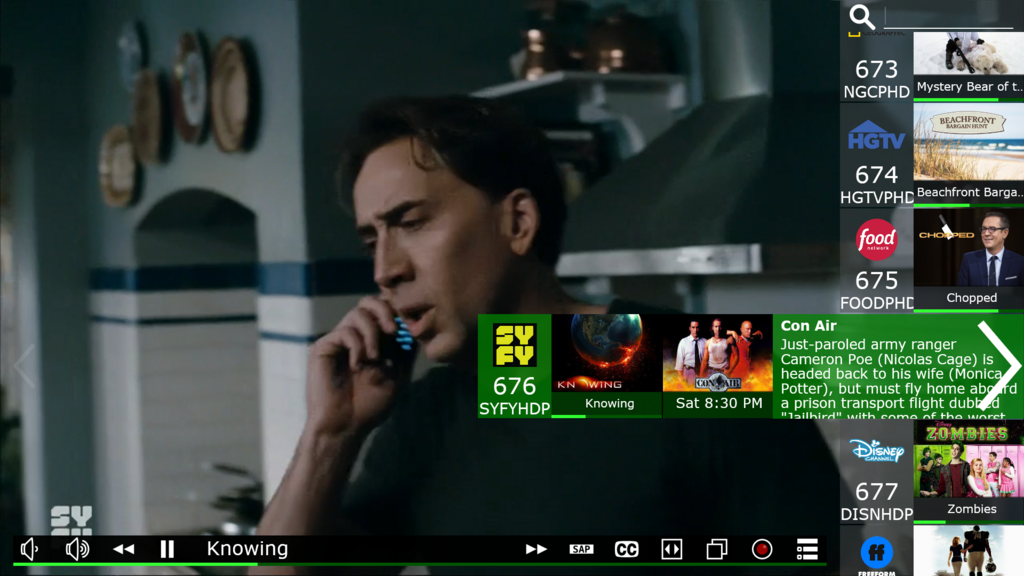
When a channel is highlighted in green you can use a right arrow to expose the next show on that channel.
Keyboard Controls
Arrow Keys – up or down opens slices. In this mode the arrow keys move you around the guide listings and the action bar. If you highlight an item on the action bar and press Enter then that action should happen. If a channel is highlighted and you press right arrow the slices guide expands to reveal information on the current show. Pressing right arrow again reveals the next show, info and start time. Esc closes the guide.
With slices closed and live tv running the left arrow skips back 10 seconds and right forward 30 seconds [if available] via time shifting feature. Space Bar will Pause/Play and works live or with slices open. Both also function when playing a recording, plus up arrow will skip 10 minutes forward and down back 10 minutes. When in the Record Engine the arrow keys provide movement around the program. Enter is used to open an area and ESC to exit. Other keyboard active keys:
Numbers – auto opens slices search by number in live tv
ESC – from live tv opens record engine, in slices it closes the guide, from a recording playing it closes the recording and returns to the recordings file.
Alt + F4 - Exit program
Mouse Control [with scroll]
Left button or scroll wheel will open the Slices Guide. In slices moving the wheel will move the green cursor up or down the guide. Moving the mouse pointer over the highlighted slice will reveal a > here. Placing the moue pointer on the > and then left or right click will open up the slice and reveal information text. Clicking again will reveal the next show on that channel and related information. On the left side of the screen will be a fainted <; clicking the left button with the mouse pointer on it will collapse or close a slice or the slices guide, using the right button will leave the guide on the opening screen. A left click with the mouse anywhere in the screen will close slices. From here it is all about positioning the pointer and clicking. Putting the mouse on any icon on the action bar and left clicking will do that action. FYI – using the scroll wheel in a recording will move the recording forward or back 10 minutes per click.
To open Settings
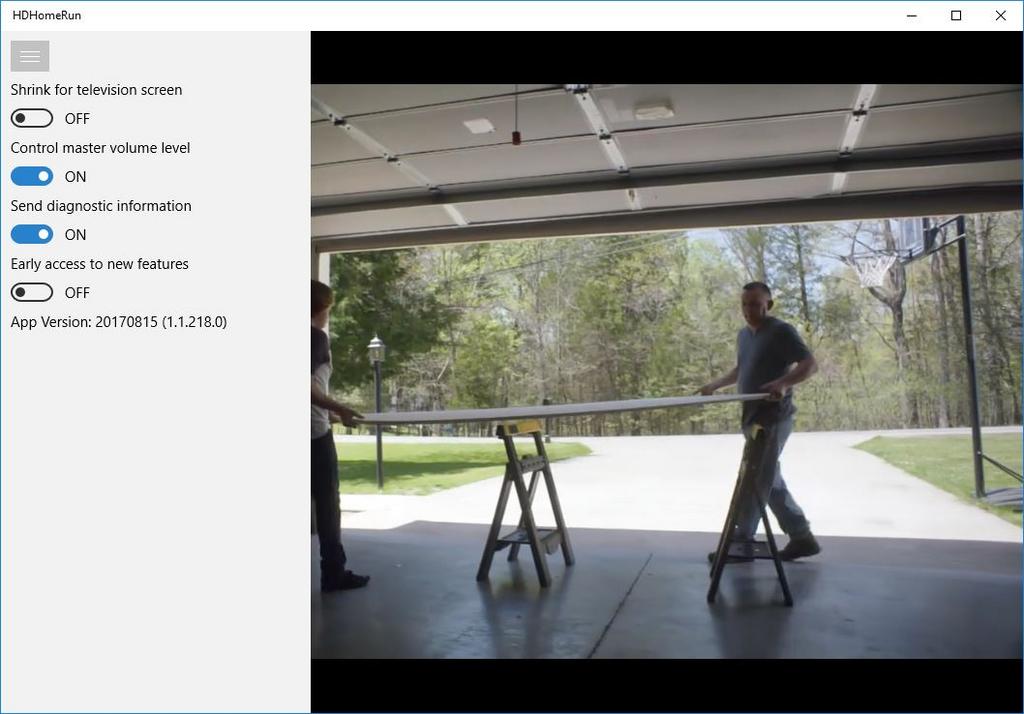
Moving the mouse point to the upper left corner of the TV screen for the SD Client and it will reveal a hidden hamburger button. Click on it to open settings. Currently there are settings of Shrink for Television Screen, Control Master Volume Level, Send Diagnostics, and Early Access to New Features. Also you will see the App version here. Early access has no function until after the Release Candidate goes public.
Remote Control
For Live TV with the slices guide closed the D pad arrows work as follows: the left arrow will move back 10 seconds and right arrow will move forward 30 seconds; up or down will open the slices guide. If the remote has recorded playback control buttons then the functions are >I [forward 10 minutes], I< [back 10 minutes], << [back about 10 seconds], >> [forward 30 seconds]. Also with the slices guide open the D pad arrows can control movement in the guide or on the Action Bar and is seen via the movement of a green highlighted cursor. Center button [or OK] either selects the channel or a function on the Action Bar. These functions also work in a recording playback.
OK button [enter or next]; Pause [works live or recorded]; Play [works live or recorded]; Volume [works live or recorded]; Back or Return [from a live tv screen it opens Record Engine, from a recording it exits].
Channel up/down – works with live tv to move one channel as expected or when in slices
Numbers – auto opens slices search [by number only for live tv only], enter available number in your guide and the corresponding channel listing will appear in the bottom right corner. Here you can right arrow to reveal program information. Use up or down arrows to move from there in the guide, or OK/Enter to open the channel.
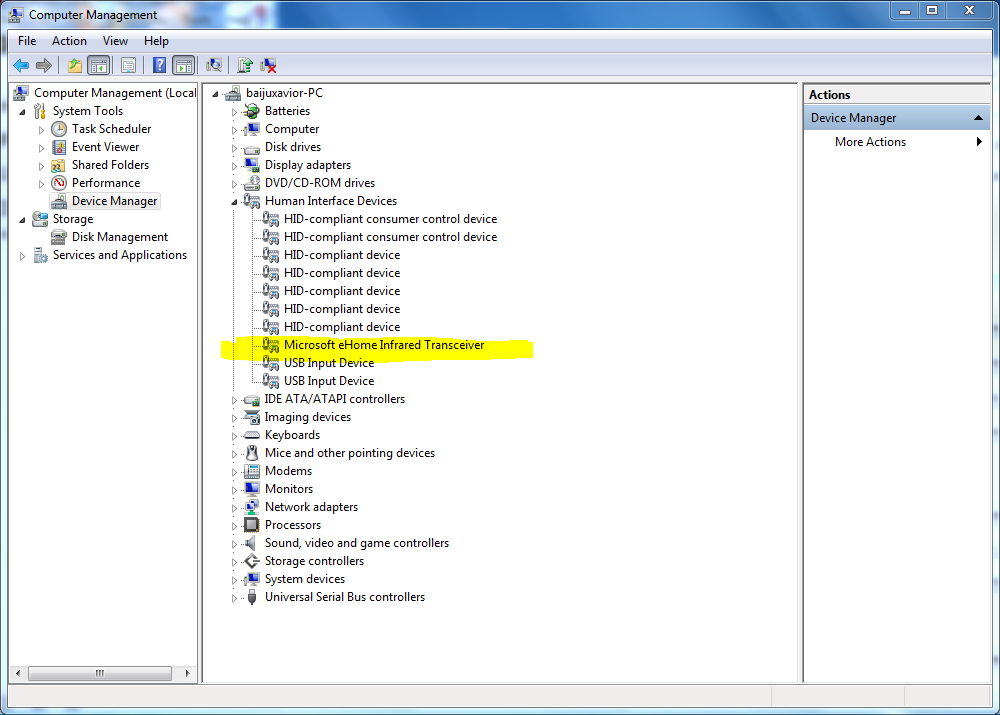
Adapt a MCE Remote to open HDHomeRun and assign keystroke.
by NYPlayer » Thu Aug 25, 2016 7:02 pm
I got this working I assigned CTRL-ALT-H to the shortcut I created on my desktop using procedure below.
1 Open A File Explorer Window.
2. On File Explorer bar type the below. (Copy and Paste)
%windir%\explorer.exe shell:::{4234d49b-0245-4df3-b780-3893943456e1}
3. Hit enter
4. Right Click on HDHomerun create a shorcut it will ask you to put on desktop that is ok. Rename Shortcut something like HDHR
Download AdvancedMCERemoteMapper from
http://forum.****.tv/showthread.php?tid=164252.
Run as administrator set your green button apply to registry restart pc.
Touch Screen
Pretend you’re a mouse! There are no controls for skipping 10 minutes forward or backwards.
Tips
Live Viewing Buffer – whenever you open a channel live you start a buffer of the stream. This allows for time shifting [and someday possibly to make it a recording]. Currently live DRM protected cable channels and those who only use the basic channel service provided by Silicondust [non-recording services] have limited playback and pause ability depending on internal ram in the rendering device. Non-subscribers may now pause a show in progress [up to 60 minutes, DRM content included] and then resume playback use skip forward.
How to have HDHomeRun open as a Window in W10
Currently the default setting is to open HDHomeRun as a full screen but if you adjust the screen size and close it that way it will open that way. Start by using the Windows Controls in the top right corner. Click on the Maximize/Restore button to switch between full screen/minimized full/smaller box. In the smaller size mode you can adjust the box to the size you like as you would any window normally. You can now use the Action bar Full screen/window button [two boxes overlapping] to toggle between full screen and the last window screen size set by the Maximize/Restore button. As long as you use the action bar to switch between window and full which ever state you close the program at it will open there.
How to Limit the Channel List
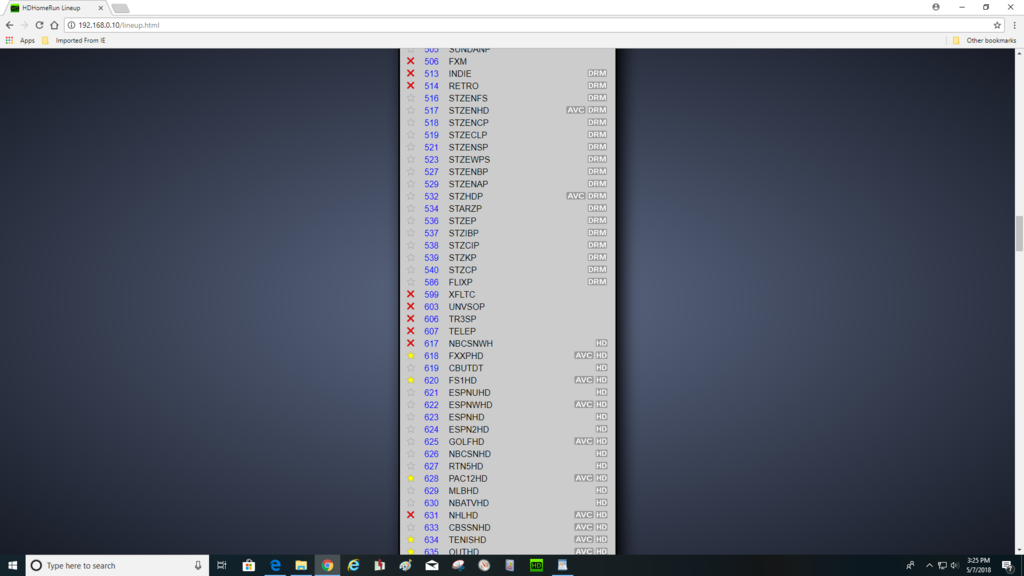
Open http://my.hdhomerun.com/ then click on the channel line in the tuner box to open Channel Lineup.Here you will find a list of channels that the tuner see’s. Pushing the Detect Channels button will rebuild the file of channels. Make sure you are not recording or watching anything as it will close all the tuners for use in the scan. This scan will take some time to compile depending on total of channels the SP has. Before or after a scan you can also click on the grayed out star. One click turns the star gold. This, for HDHomeRun record engine creates a priority for a channel as a recording source. It also adds the channel to a favorites file used by DLNA direct tuning systems. A second click removes the channel from some DVR or viewing only systems [specifically HDHomerun]. Lastly you may see badges to the right side of the list. No badge means the channel is 480 or Standard Definition, HD means it is either 720 or 1080 High Definition, AVC means it is distributed by the provider as h.264 rather than the more common MPEG2. Another badge is DRM [digital rights management] which is an additional protection beyond encryption that the CC is used for decoding. Multiple badges may exist for one channel. For those with a prime and a CC properly setup the channel list should show all the channels that are authorized by your subscription with your SP after running Detect Channels from the Channels Lineup section.
The basic level of guide service for a tuner purchaser is 24 hours of slices guide. Extended DVR service is available.
Please see the Record Engine Users Guide for instructions related to expanded functions of the integrated DVR.
Edit 5/9/18